
Paxton Net2 Setup for ClubManager Sign in Client
Before you set the ClubManager Sign in client up you must setup the Paxton Net2 package.
Create a “Department”
First step is creating a department.
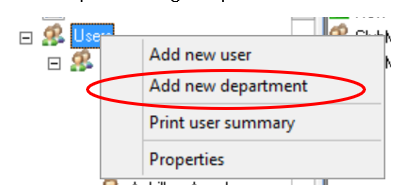
Right click on “User” and select “Add New Department”.
Call the Department “ClubManager” and save it.
Create “Access Level”
Next you create the Access level that will allow the software to interact with the access list in the Paxton software.
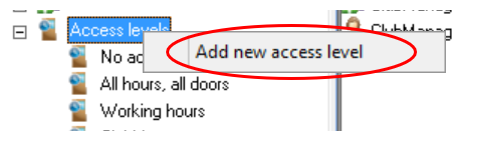
Right click on “Access Levels” and select “Add new access level”
In the dialogue screen please select “All hours, All Doors”
Name the new access level “ClubManager”
*This must be spelt correctly as it is hardcoded in the sign in screen client software.
Click OK
Create a New “User”
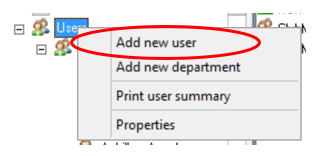
Right click on “User” again and select “Add New User”
Create a user named “ClubManager”,
Click on “Access Level” and choose “ClubManager”,
Click on “Department” and choose “ClubManager”
Select Access level as “ClubManager”
Save.
Create an “Operator”
Right click on “Net2 Operators” and select “Add New Operator”
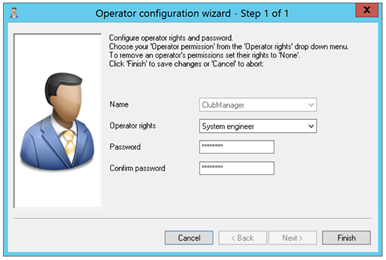
Select “ClubManager” from the Name list,
Operator rights should be “Supervisor” or “System Engineer”,
Create and confirm a password to use with the operator account.
Click on Finish.
Set Up the ClubManager Sign in Client
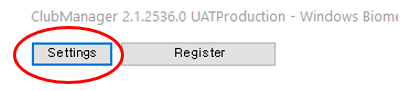
Open the sign in client,
Click on “Settings”
On the Settings page, click the “Paxton NET2” tab

You will need to know either the IP Address or the host name and the port of your Paxton NET2 server, the Paxton NET2 installer should be able to assist you in supplying this.
For installations where the Paxton Net2 and Sign in Client are installed to the same PC then 127.0.0.1 can be used.
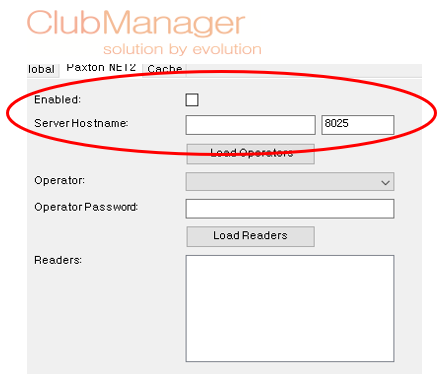
Tick “Enabled”
Click on “Load Operators”
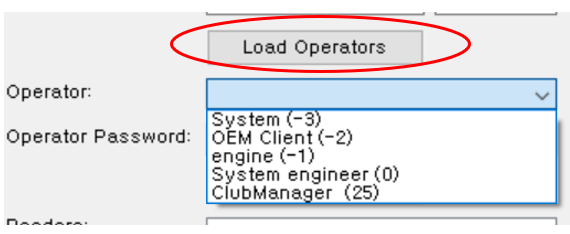
In the drop down operator list select “ClubManager”
Enter the password you set for the operator in the previous Net2 setup steps
Click the “Load Readers” button which will show a list of all the configured Paxton NET2 ACU’s (access control unit’s).
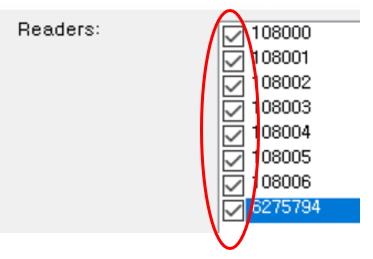
Tick all readers you wish the client to respond to
(normally all of them but may differ if you do not want the client controlling access to certain areas)
Click “OK” to finish
You should now have a “Sync” button on the front screen of the sign in screen that when clicked will initiate the population of Net2 with the members in your system that have a Card Number in their details page and a valid membership .