Steps on processing a product purchase for a guest
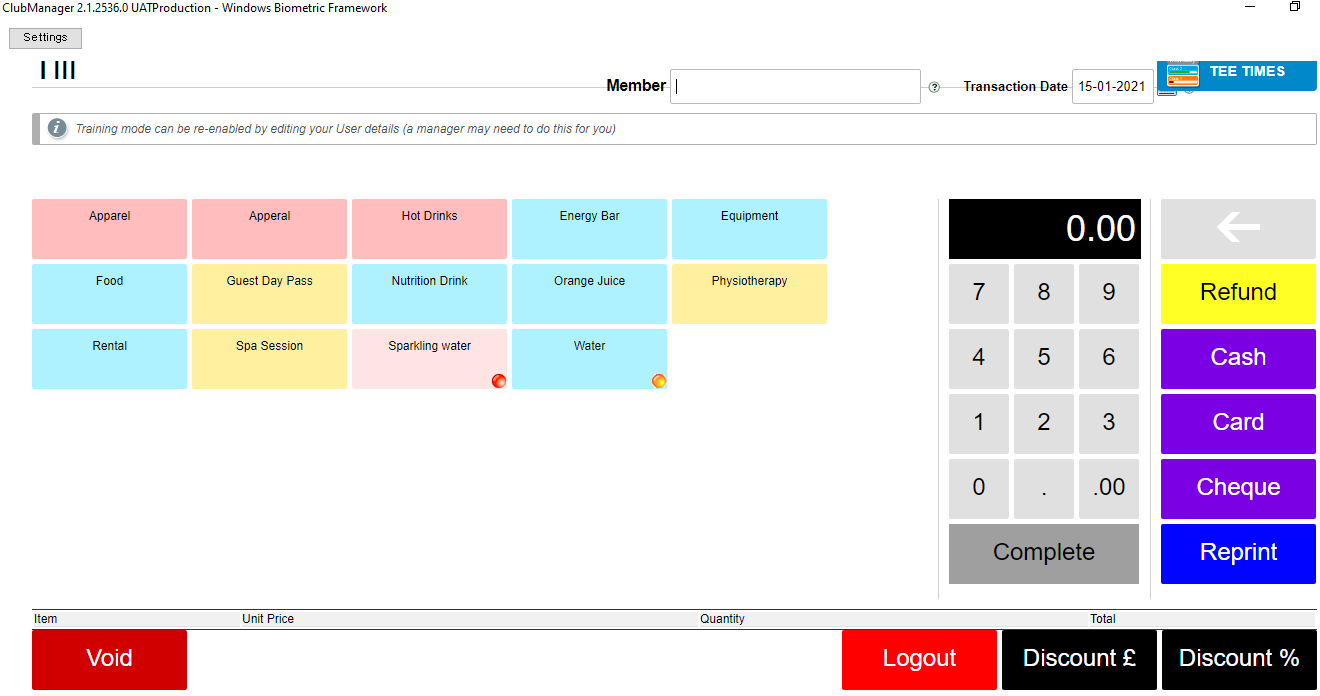
The Point Of Sale (POS) can be downloaded to your PC and stored locally, this POS will connect with an EPSON printer and print receipts for members.
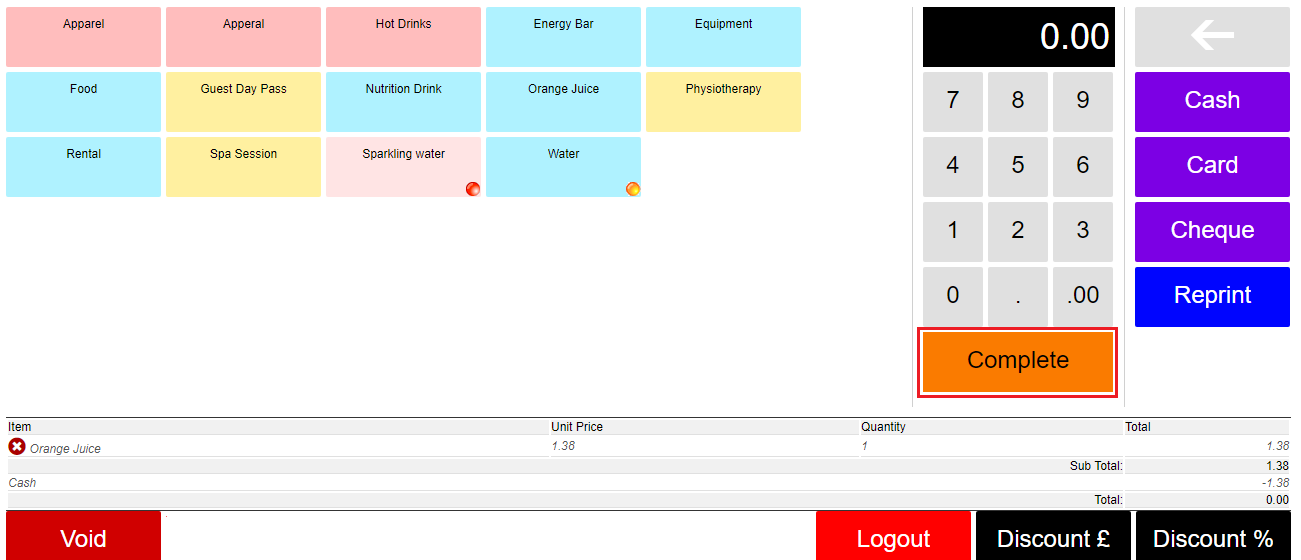
- Open Point of Sale (The Client)
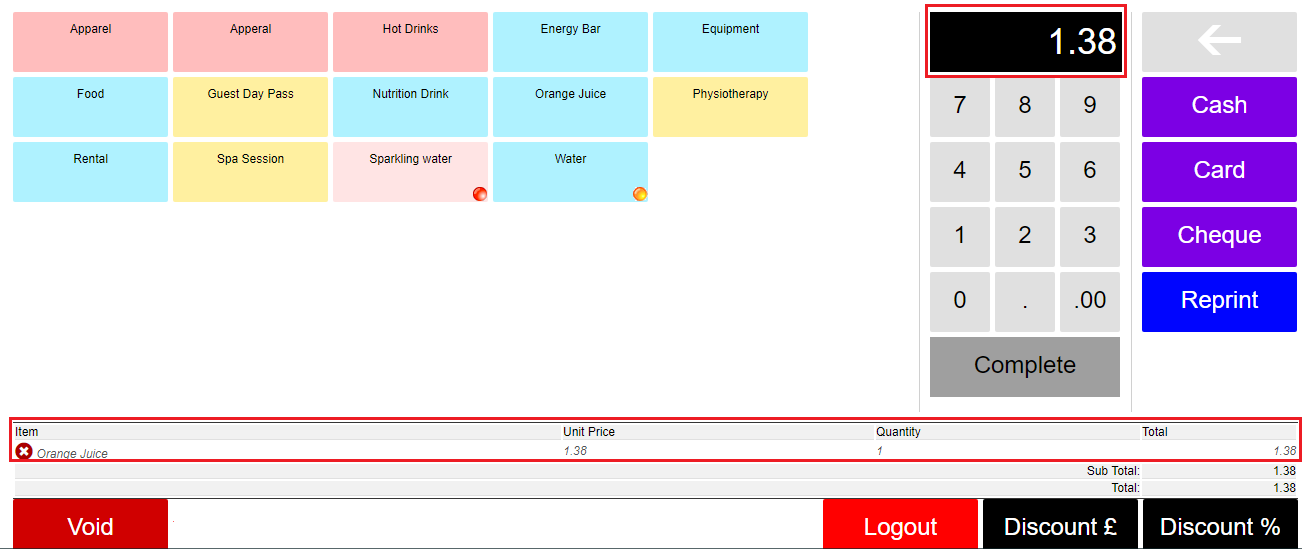
- Select the product the guest is purchasing (Only click once on the product and notice change of value in the black box)
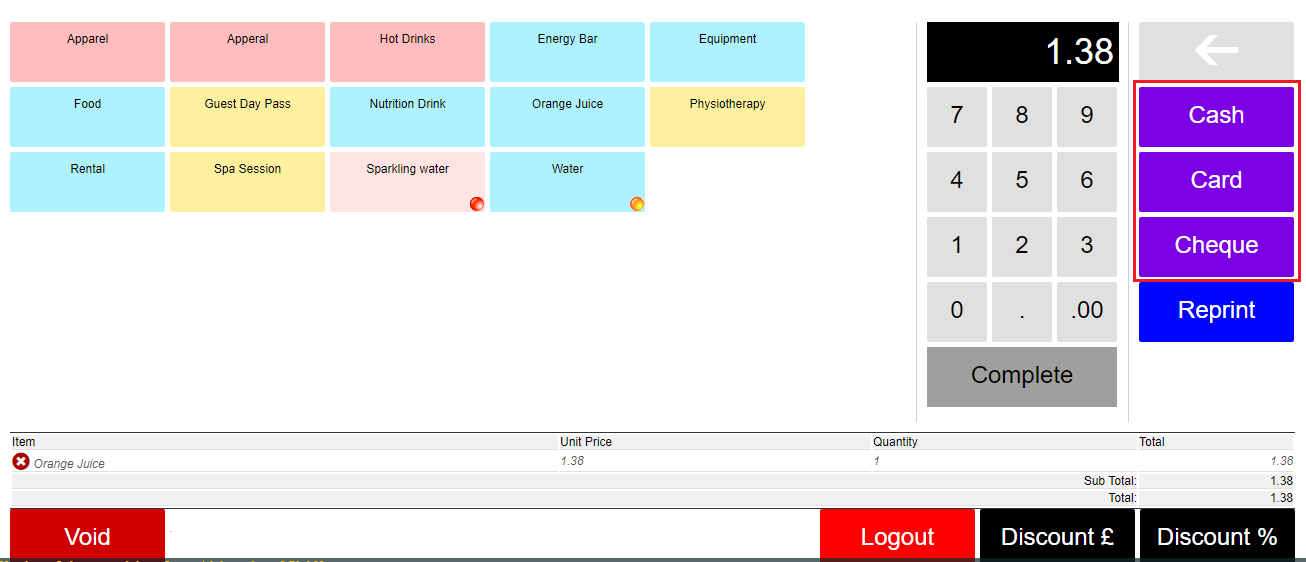
- Select type of method the guest is using to pay for the product (Cash, Card or Cheque)
- Click on “Complete” to process the purchase, a receipt will be printed out through the Epson printer
- Click on “Reprint” to print out a copy of the receipt to keep for the club

Steps on processing a purchase for a member
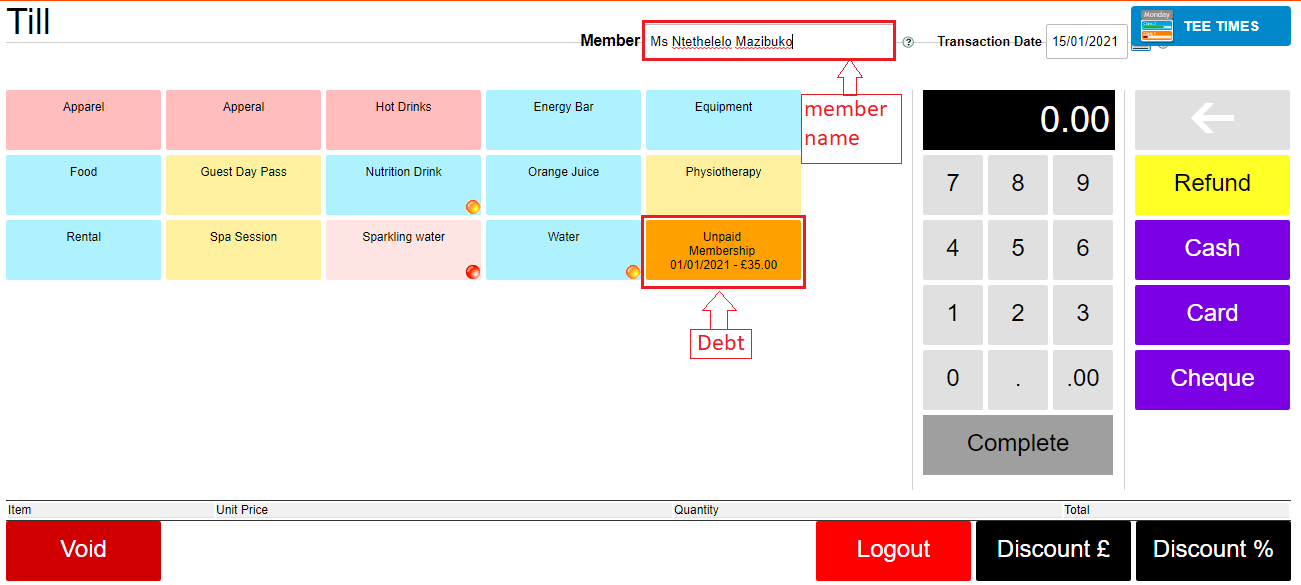
- Enter the member name and surname or member number on the “Member” text field on the “Till” screen
HINT** If you are using cards for access control, add the member card number into the member text field to bring up the member name
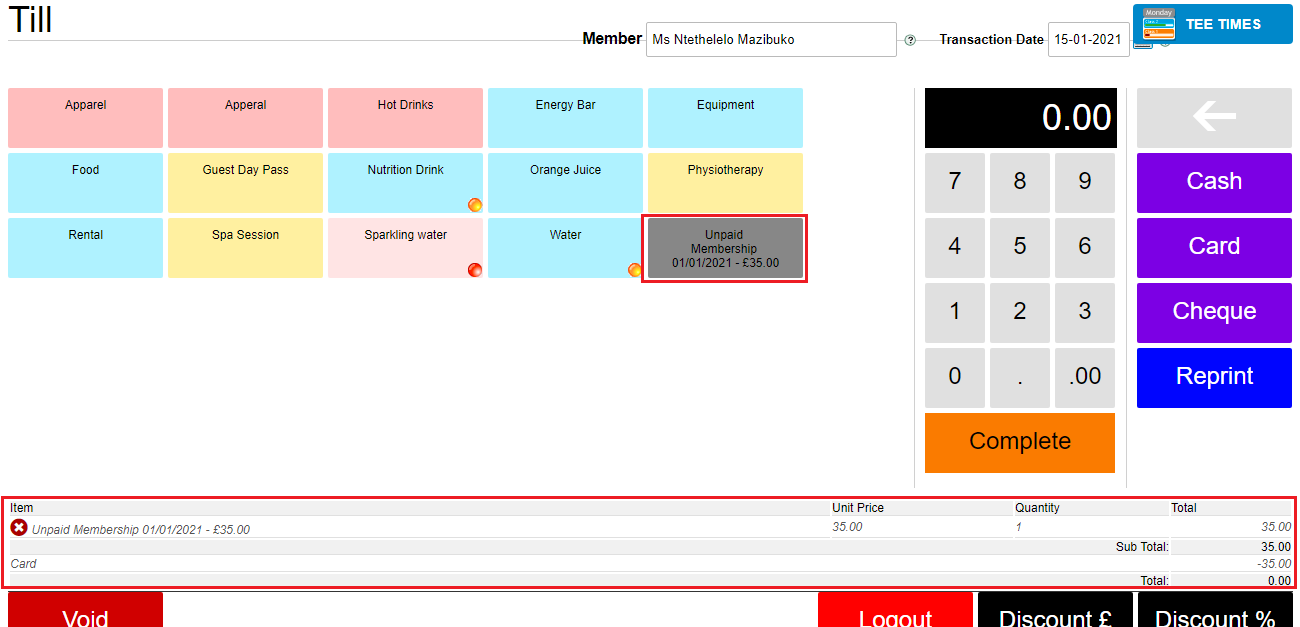
- Select the membership payment member is making (all debt/outstanding payments will be in an orange box). Notice the change of color when the orange box is clicked on
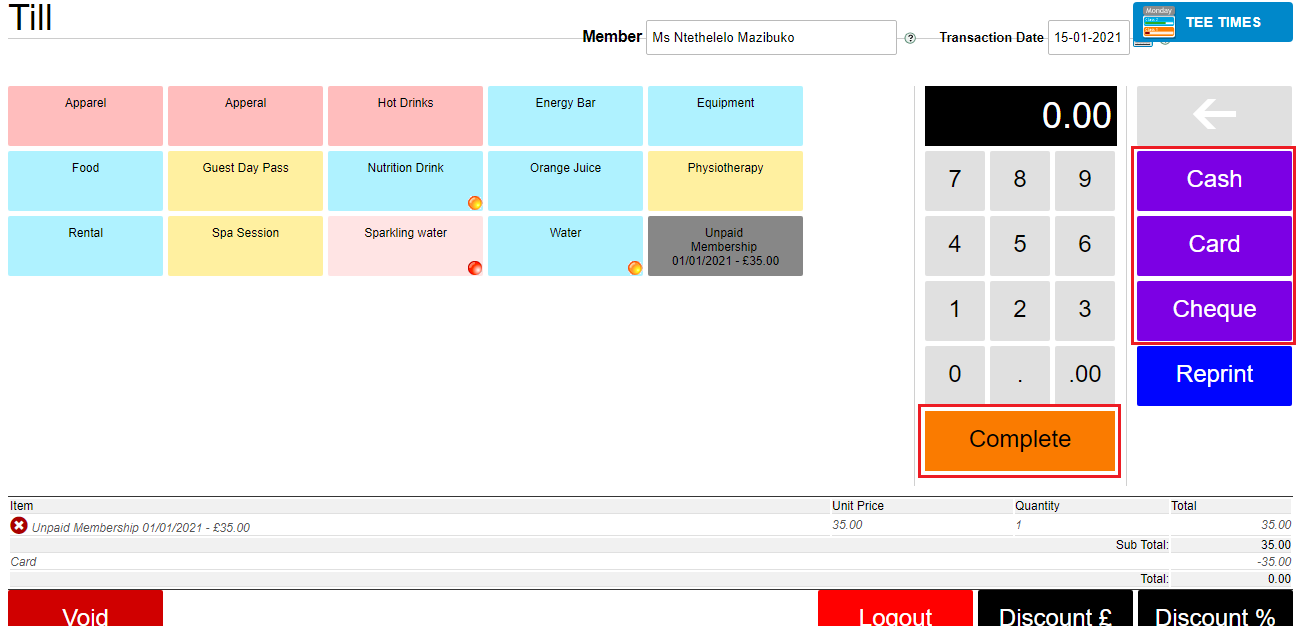
- Select type of method the guest is using to pay for the product (Cash, Card or Cheque)
- Click on “Complete” to process the purchase, a receipt will be printed out through the Epson printer
- Click on “Reprint” to print out a copy of the receipt to keep for the club
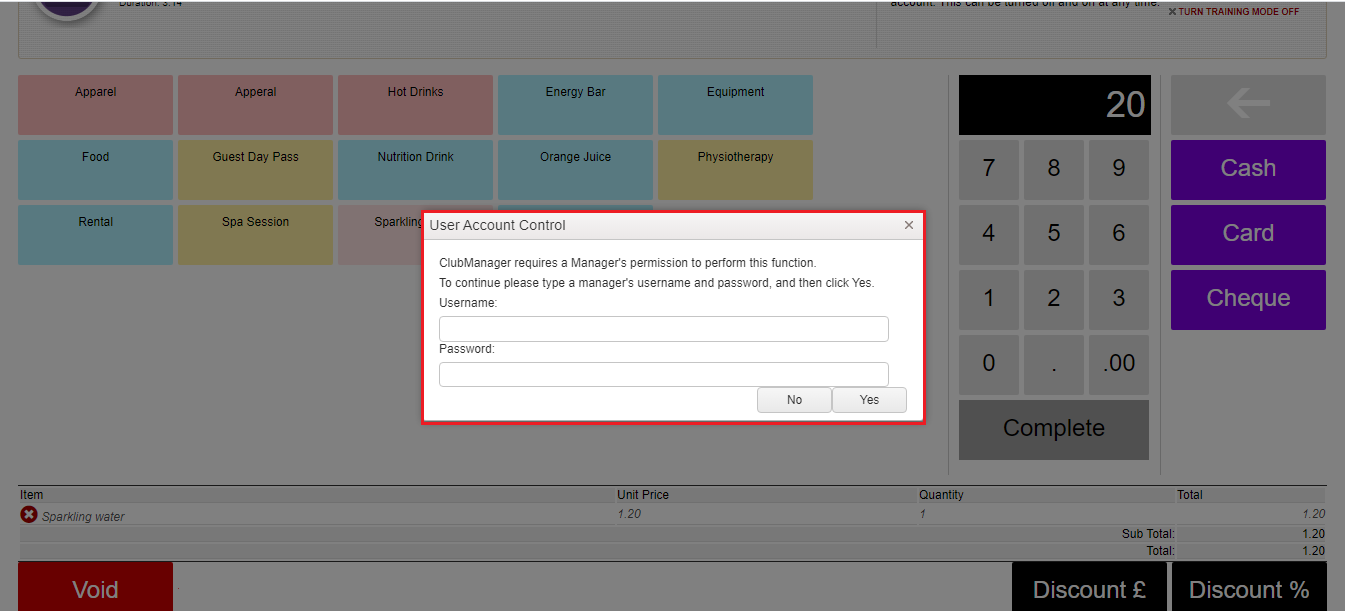
When you are running a special on products or giving out discounts; click on “Discount” before completing your purchase.
- Select product on discount, enter the amount of discount on the keyboard and proceed to click “Discount” at the bottom right of the “Till” screen.( Discounts can be in percentage or monetary). Proceed to click “Complete” to complete your purchase
- discount can only be applied by managers
- a pop-up window will appear for the manager to add in their username and password to authorize the discount

A pop-up window will be displayed as follows;
the manager will then have to authorize the discount by filling in their ClubManager login details on the empty text boxes and proceed to click on “Yes” to give discount on product
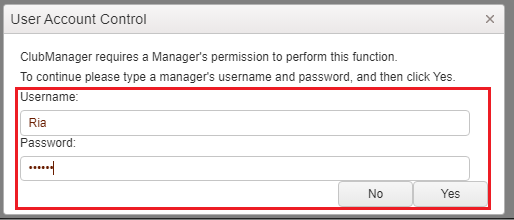
product is now discounted;

How to process a refund
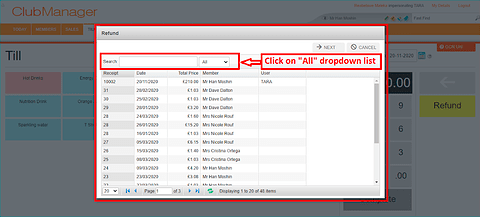
Click on ‘Refund’ once
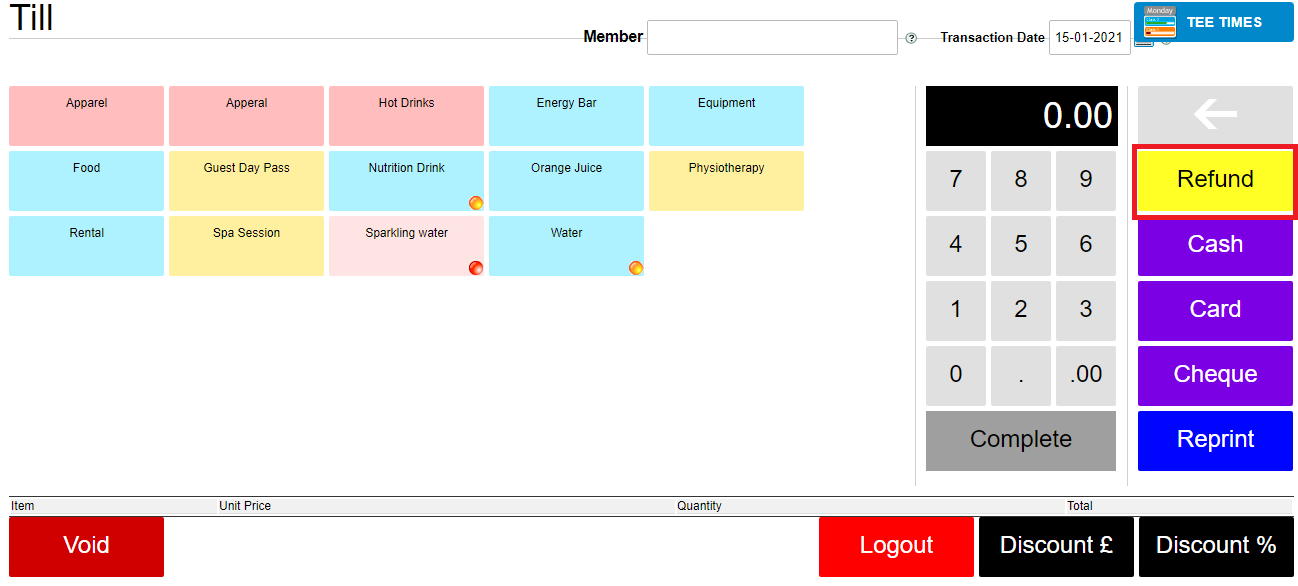
A pop up screen will appear;
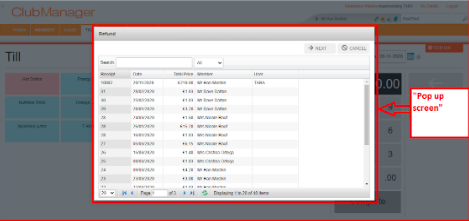
On the search bar: click on ‘All’ drop down list in order to select ‘Receipt’ to process a refund with a receipt number in case the refund being processed is for a non-member. When processing a refund for a member you can search their name on the search bar.
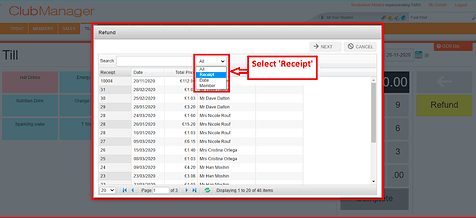
- Select ‘receipt’ to process refund with a receipt number for non-members or enter member name on search bar for club members; it is advised to process a refund with a receipt number to avoid making mistakes.
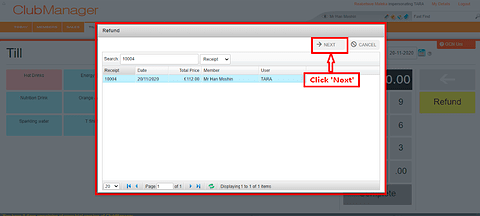
Select ‘Receipt’ and enter the receipt number you wish to refund and press enter –

- Click once on the receipt number to highlight the product
- Click “NEXT” when the product is highlighted
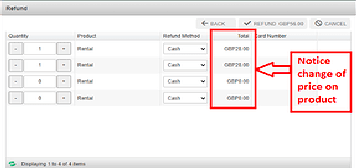
Reduce quantity; while reducing quantity, please notice how the total price of product reduces
If the receipt has more than one product sold, then remove those items by reducing the quantity to zero on the items that are not being refunded
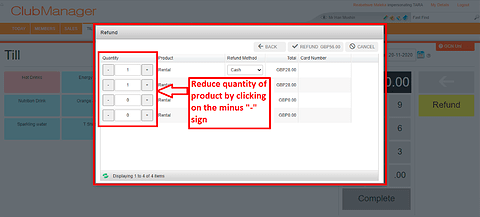
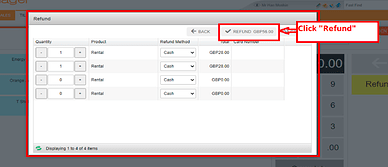
- Click on ‘Refund’ on the right side of the ‘popped up screen’. Transaction is now complete
Always remember to logout each time you are done using the Till or when you are done with your shift to avoid another person using your account to process payments

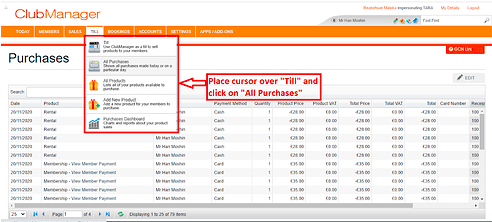
All Purchases
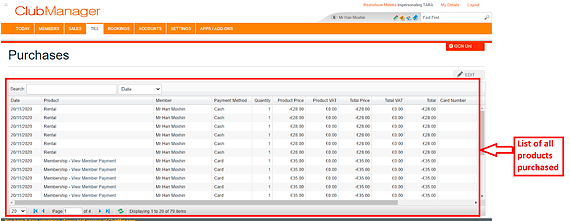
Viewing all purchases made in the club
Search can be done by the following fields:
- Date
- Product
- Member
- Quantity
- Product price
- Product VAT
- Total Price
- Total VAT
- Total
- Receipt
- Card number
- User
These fields can be used to isolate all purchases according to one of the above categories
All Products
How to get to the all products page
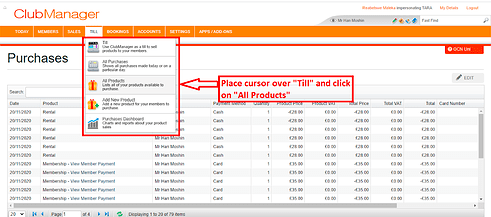
The “All Products” page lists all products available for purchase and also allows you to add in a new product, edit products (such as increasing stock levels), remove products which are no longer for sale
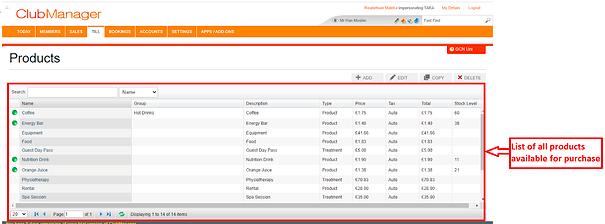
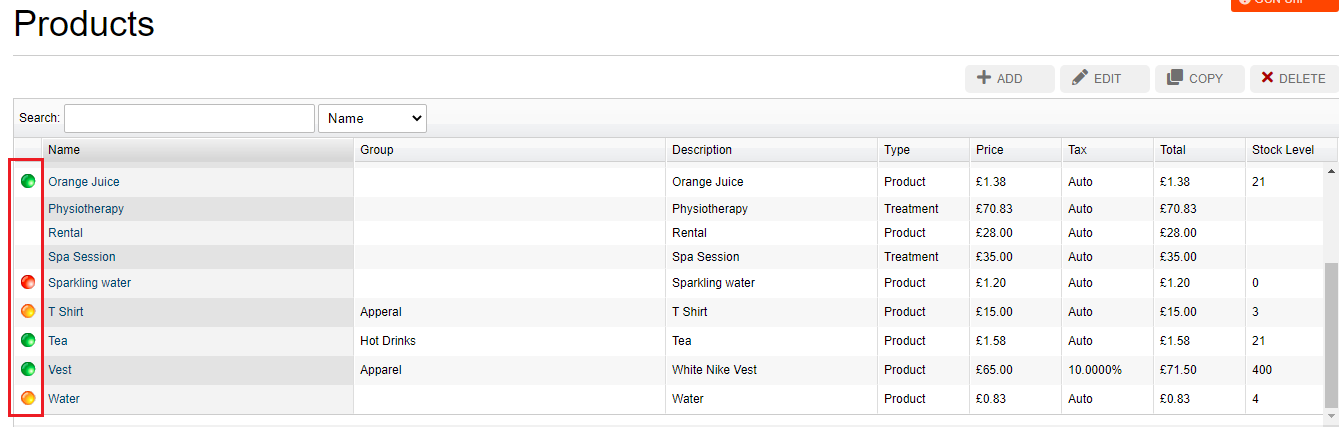
The all products table have indicators for stock; there are small circles on the left side of each product name
- green - sufficient stock ( only shows on the all products page)
- amber - past reorder threshold (time to order) (shows on till and all products)
- red - no stock (shows on till and all products)
When new stock arrives, you need to go to the product on the all products page, select the product and add the delivered new stock amount to the current amount
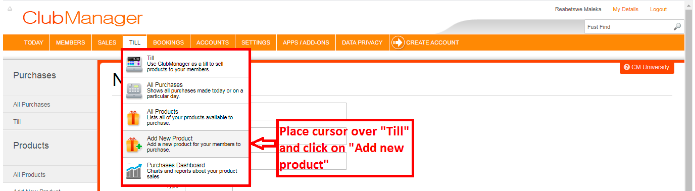
Add New Product
How to get to the add new product page
Below screenshot is the “New Product” screen:
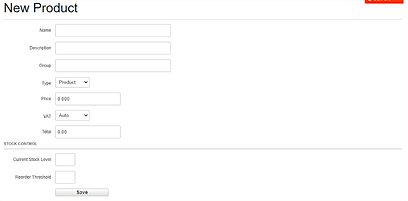
Fill in the empty fields as required to add in a new product
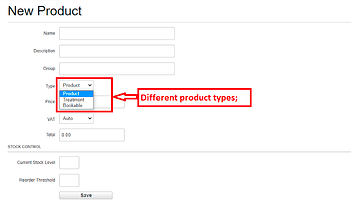
Please note that there are three types of products, namely;
- product; e.g. food and drinks
- bookable; e.g. classes or session
- treatment; e.g. spa treatment
Specify the type of product when adding a new product by clicking on the drop down list
Once done filling in the empty text boxes click on save to add in the new product
Stock levels
How to manage stock
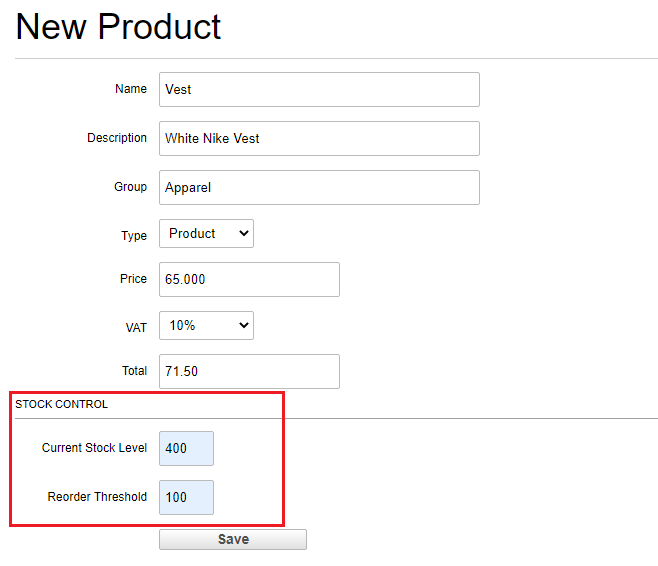
When adding a product there are two fields at the bottom of the screen:
- current stock level - how much stock you have on the premises available for sale
- Reorder Threshold - Once this stock level is reached, you need to reorder that product
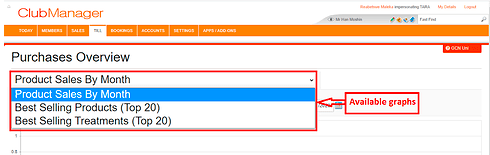
Purchases Dashboard
Charts and reports about product sales
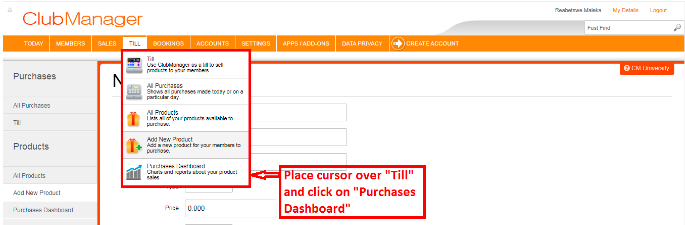
How to get to the purchase’s dashboard
By clicking on “Product sales by month” dropdown list two more chart titles will appear to view available graphs. Namely;
- Product Sales By Month - Shows the total count of products sold in a given month
- Best Selling Product (Top 20) - shows a graph of the best 20 products sold at the club;
- Best Selling Treatment (Top 20) - shows a graph of the best 20 treatments offered at the club